Part 5 – SwimEye Product Guide
Part 5 – Pool Security Installation
The installation process for drowning detection in your pool.
Installation suitable for any pool
When installing SwimEye drowning detection, there are generally two typical types of project. New construction and installation into an existing pool.
As SwimEye primarily uses underwater cameras to achieve monitoring of drowning incidents, both scenarios come with their own challenges and opportunities.
When installing the underwater cameras, we must create a penetration through the pool wall. To ensure a water-tight fit, the specification of the penetration is very precise:
- For a concrete pool, we core drill through the pool wall.
- For steel pools, we neatly drill through the pool wall, then install a steel mounting bracket.
The underwater camera houses are installed and fastened directly into the pool-wall penetration.
Installation without draining water
Drilling the pool wall is best completed without water in the pool. However, in many pools, we can complete the drilling and installation process when the pool is full of water.
When the pool is full of water, drilling occurs directly into the pool wall from the pool basement. The pressure of the water pushes any mess back into the basement area, and only a small amount of water escapes, as we install a temporary plug.
After this, the underwater camera houses can be installed, by diving into the pool, removing the plug and quickly installing the camera house.
For in-ground pools (those without a basement), small excavations are required to enable the same camera installation process and for the installation of wiring from each camera.
Simple to Install
The build-up of the wiring and communications hardware is quite simple. Therefore, is it very common for the building owner or head building contractor to purchase, manage and install this component of the system.
At SwimEye, we call this the General Build-Up.
Each camera is wired to a central communications room or server room. In the communications room, switching panels link the underwater cameras to the SwimEye computers. Finally, we connect the whole system to the Internet; which allows us to undertake remote access for system set-up, ongoing maintenance and any software updates.
Monitoring and Control Station
The SwimEye user interface (GUI) is called the Monitoring and Control Station. Most commonly, the Monitoring and Control Station is installed in the lifeguard room or pool reception.
For a typical 25m pool, this includes two computers and two screens.
For aquatic centres with an Olympic Swimming Pool, or multiple pools, we use a large TV to display the graphic user interface.
As physical space is often limited in the lifeguard room or reception area, we can also place the computer towers into a separate communications/server room, requiring only one small computer and one large TV screen in the lifeguard station.
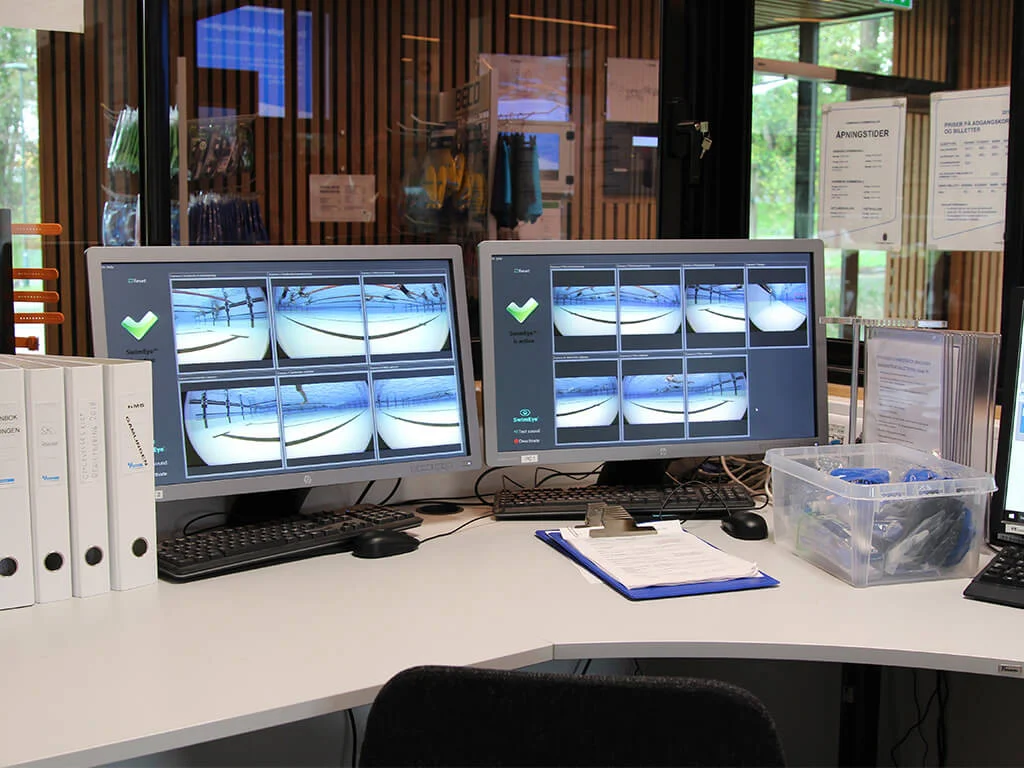
Two-screen Monitoring & Control Station which is typical for a 25m pool. This example is located in an aquatic centre reception area.

Large screen Monitoring & Control Station at an aquatic centre with four pools, including an Olympic Swimming Pool